Pythonにstlを操作できる
「numpy-stl」
というライブラリがあります。
使用するためにはインストールする必要があり、
pip install numpy-stl
で使用できるようになります。
このページではおもに、すでに作成されたstlをこのnumpy-stlで操作する方法を説明します。
出力されたstlの確認にはMeshlabを使用しています。
犬の形をしたstl(‘dog.stl’)を使用します。
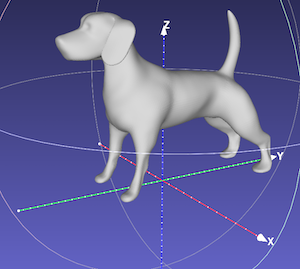
free3d.comよりダウンロード
0. ライブラリをインポートする
numpy-stlパッケージはpipで配布されているので、pipの使える環境で、ターミナルで
pip install numpy-stl
とすればインストールできます。
Pythonで使用するときは
from stl import mesh
でインポートするのが一般的のようです。
import numpy as np
from stl import mesh
1. stlを読み込む
stlデータ = mesh.Mesh.from_file(‘stlファイル名)
stl_data = mesh.Mesh.from_file('dog.stl')
# stl_dataにstlの情報が入る
このstl_dataがオブジェクトとなります。
2. stlの保存
stlのデータ.save(‘保存ファイル名’)
stl_dataのオブジェクトをセーブするにはこのコマンドで行います。
stl_data.save('dog_copied.stl')3. stlのデータを移動、回転する
stlの移動
stlのデータを平行移動する
stlデータ.translate(移動ベクトル :numpy.array型)
X軸方向に10, Y軸方向に20, Z軸方向に30, 表面データを移動します。
import numpy as np
from stl import mesh

stl_data = mesh.Mesh.from_file('dog.stl')

t = np.array([10, 20, 30])
stl_data.translate(t)
stl_data.save('dog_translated.stl')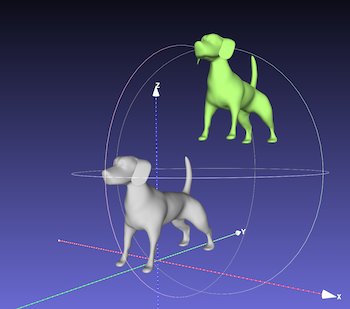
グレー:dog.stl(移動前) 緑:dog_translated.stl(移動後)
stlの回転
stlのデータを回転、移動する
stlデータ.transform(4×4行列)
広く使えるのはこの使い方です。
移動と回転の操作が4×4行列一つで行えます。
4×4行列には回転、移動情報を入れることができます。
3×3行列Mで回転し、\((t_x, t_y, t_z)\)方向に移動させる行列は
\(R =
\left(
\begin{array}{ccc|c}
& & & t_x\\
& \Large{M} & & t_y\\
& & & t_z\\
\hline
& \large{0} & & 1
\end{array}
\right)\)
です。
使用するには
stl_data.transform(R)
と書くと、stl_dataは変換行列Rで変換され
stlのデータを入れている
stl_data
は上書きされます。
Z軸まわりに60°回転するとします。
Z軸まわりに60°回転した行列を代入します。
Z軸回り\(\theta\)の回転は
\(
\begin{pmatrix}
\cos \theta & – \sin \theta & 0 \\
\sin \theta & \cos \theta & 0 \\
0 & 0 & 1
\end{pmatrix}\)
(\(\theta\)はラジアン表記)
で表せますので、
stl_data = mesh.Mesh.from_file('dog.stl')

matrix = np.array([[np.cos(np.deg2rad(60)), - np.sin(np.deg2rad(60)), 0],
                   [np.sin(np.deg2rad(60)), np.cos(np.deg2rad(60)), 0],
                   [0, 0, 1]])
#np.deg2rad()は角度をラジアン表記に変換する関数

R[:3, :3] = matrix
print(R)
stl_data.transform(R)
stl_data.save('dog_z_rotated60.stl')
グレー: dog.stl 緑: dog_z_rotated60.stl
Z軸まわりにモデルが回転しています。
4. 軸回りに回転する
stlデータ.rotate(軸ベクトル, 回転角度(radian))
軸方向への回転はこの表記でも実行できます。
x, y, z = [1, -1, 1]のベクトル周りに表面データを30°ずつ回転させます。
import numpy as np
from stl import mesh

stl_data = mesh.Mesh.from_file('dog.stl')

stl_data.rotate(np.array([1, -1, 1]), np.deg2rad(30))
#np.deg2rad()は角度をラジアン表記に変換する関数
stl_data.save('dog_axis_rotated30.stl')

stl_data.rotate(np.array([1, -1, 1]), np.deg2rad(30))
stl_data.save('dog_axis_rotated60.stl')

stl_data.rotate(np.array([1, -1, 1]), np.deg2rad(30))
stl_data.save('dog_axis_rotated90.stl')
グレー: dog.stl 黄色: dog_axis_rotation30.stl
緑: dog_axis_rotation60.stl 赤: dog_axis_rotation90.stl
5. stlの情報を得る
点群データの抽出
points = stlデータ.points.reshape([-1, 3])
#点のx, y, z座標をとる
point_list = numpy.unique(points, axis=0)
#重複している点を削除
stlデータに.points属性があります
stl_data = mesh.Mesh.from_file('dog.stl')
print(stl_data.points)
[[15.047313 8.529594 -0.49951768 … 14.859968 8.67889
-0.73027855]
[15.047313 8.529594 -0.49951768 … 14.820316 8.625533
-0.5090847 ]
[15.000342 8.477547 -0.26739568 … 14.820316 8.625533
-0.5090847 ]
…
[21.150438 0.15598121 16.239843 … 21.205637 0.23986353
16.229225 ]
[21.205637 0.23986353 16.229225 … 21.260057 0.31812167
16.235666 ]
[21.205637 0.23986353 16.229225 … 21.255892 0.32407686
16.221685 ]]
# stl_data.pointsには三角形の3点のx,y,zが並んでいる
stl_data.pointsは9個の数字から成り立っていますが、これはメッシュを構成する3角形の頂点3つののxyz座標です。
そのため、点のデータを書き出すためにはreshapeする必要があります。
xyz座標のnumpyリストに変形します。
points = stl_data.points.reshape([-1, 3])
print(points)
[[15.047313 8.529594 -0.49951768]
[15.090207 8.585484 -0.7257249 ]
[14.859968 8.67889 -0.73027855]
…
[21.205637 0.23986353 16.229225 ]
[21.260057 0.31812167 16.235666 ]
[21.255892 0.32407686 16.221685 ]]
#座標データとして出力される
三角形の頂点は複数重複していますので、これらの重複をとると、点だけのデータとなります。
print(len(points))
# 298272
point_list = np.unique(points, axis=0)
print(len(point_list))
# 49714
print(point_list)
[[-5.7769 16.6657 0.4585]
[-5.7701 16.8729 0.5121]
[-5.7679 16.8331 0.6828]
…
[ 5.7679 16.8331 0.6828]
[ 5.7701 16.8729 0.5121]
[ 5.7769 16.6657 0.4585]]
重心などのパラメータ
重心、体積などのパラメータを取得できます。
体積, 重心, 慣性テンソル = stlデータ.get_mass_properties()
stl_data = mesh.Mesh.from_file('dog.stl')
volume, cog, inertia = dog_stl.get_mass_properties()
print(volume)
# 体積
# 1768.901177949426
print(cog)
# 重心座標
# [-4.68314523e-08,  8.22629170e-01,  1.35953082e+01]
print(inertia)
# 慣性テンソル
# [[ 1.58685377e+05  6.46135023e-04 -1.40242942e-04]
# [ 6.46135023e-04  4.95679782e+04  3.62822773e+04]
# [-1.40242942e-04  3.62822773e+04  1.29808852e+05]]
計算された座標値を利用して、原点を重心に設定します。
stl_data.translate(-com)
stl_data.save('dog_centered.stl')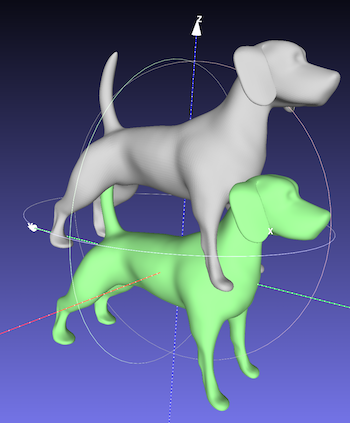
グレー: dog.stl 緑: dog_centered.stl
重心を原点に移動できています。
- インストール
- インポート
- stlデータの読み込み
- stlデータの保存
- 平行移動
- 4×4行列移動
- 指定軸まわりの回転
- 点群データの抽出
- 各パラメータの抽出
pip install numpy-stl
from stl import mesh
stlデータ = mesh.Mesh.from_file(‘stlファイル名)
stlデータ.save(‘保存ファイル名’)
stlデータ.translate(移動ベクトル :numpy.array型)
stlデータ.transform(4×4行列)
stlデータ.rotate(軸ベクトル, 回転角度(ラジアン))
stlデータ.points.reshape([-1, 3])
体積, 重心, 慣性テンソル = stlデータ.get_mass_properties()